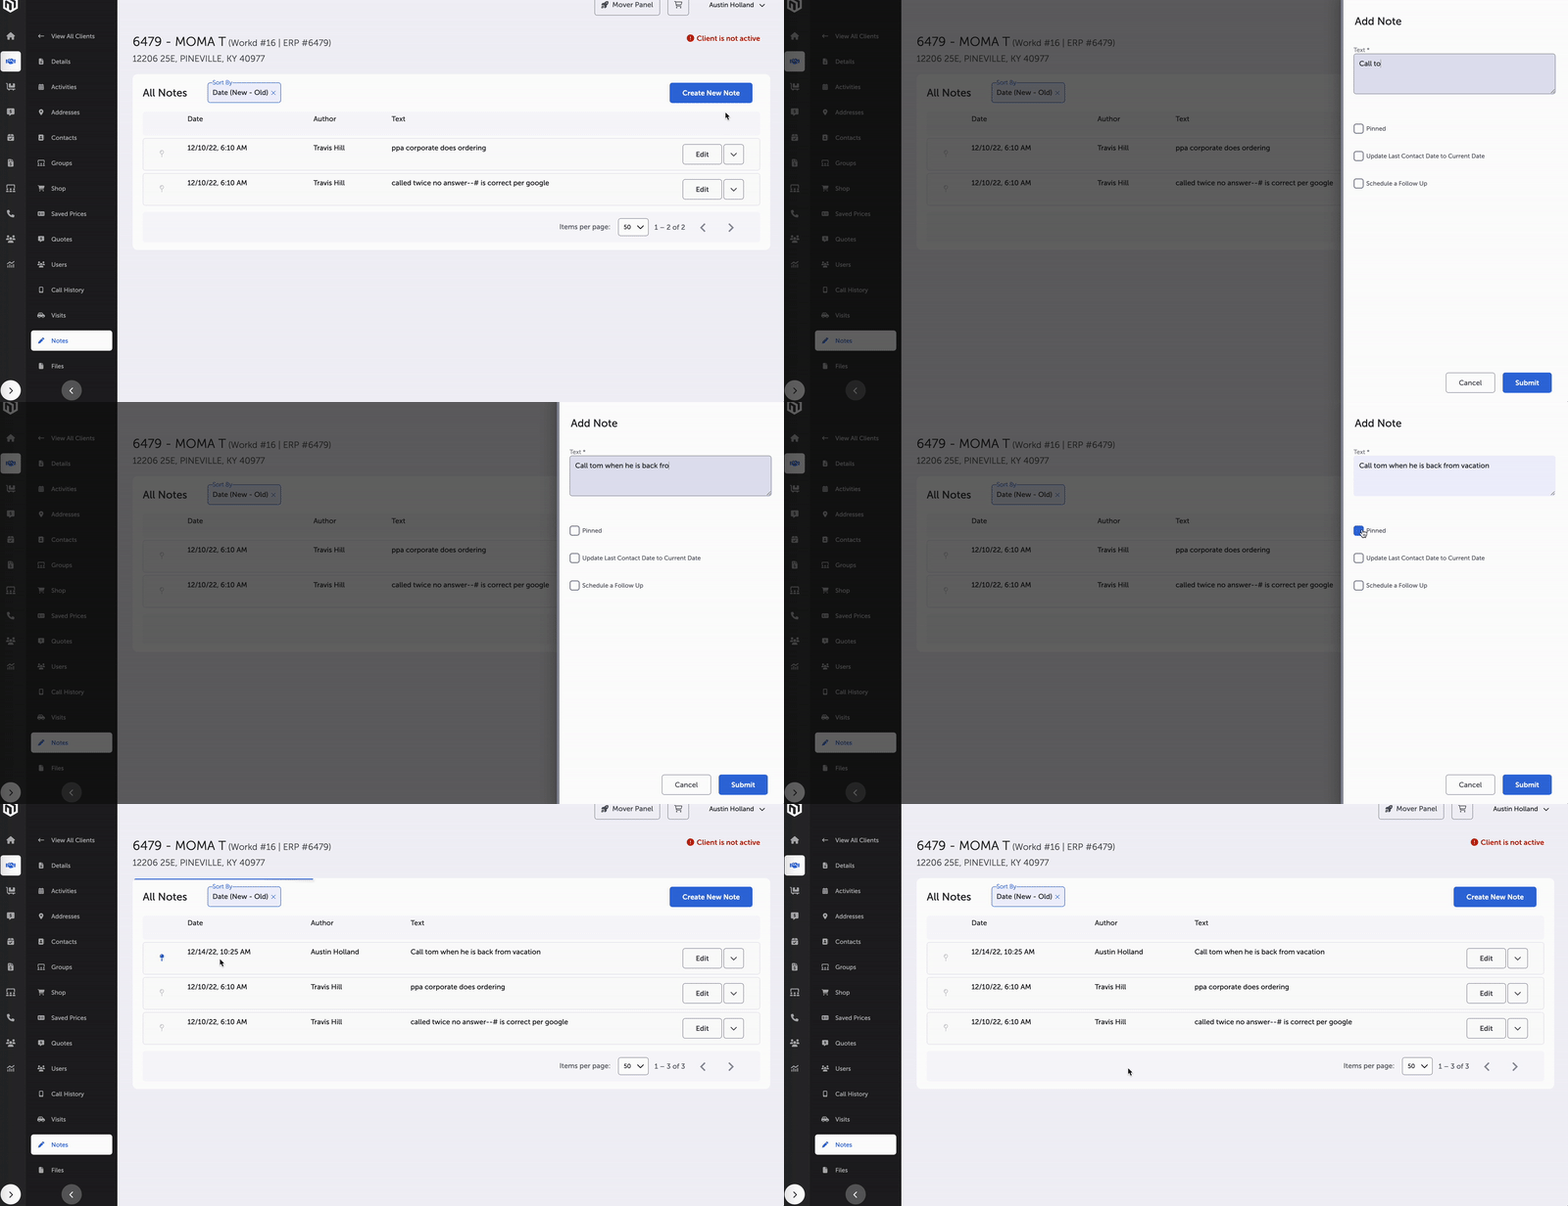
Notes
All roles have access to Notes.
The Notes page lists created notes for that individual client. Sales reps get access to all of their own notes for that individual client. The page allows you to create new notes, edit existing notes, delete notes, and pin notes so they display on the main client details page.

Create Note
This feature can be accessed through the + Create Note button in the upper right hand corner of the notes display area.
Once selected, the display brings up a prompt for the new note. Text can be entered there, and the note also has the following checkbox options:
- Pinned (to display in the main customer details page)
- Update Last Contact Date to Current Date
- Schedule a Follow Up Activity - if selected, the following displays:
- User (required; pre-populated as current user)
- Priority (required; dropdown; Low, Medium, High)
- Subject (required)
- Description
- Start Date
- Start Time
- Repeat (dropdown; Never, Daily, Weekly, Monthly)
Select Save to finish.
Each note has a dropdown menu on the right side of the display area. Selecting "edit" from the dropdown menu allows you to enter new information on that specific note, amending or replacing the text, and setting the note as pinned or unpinned. Sales Reps can edit their own notes only.
Each note has a dropdown menu on the right side of the display area. Selecting "delete" from the dropdown menu allows you to delete that specific note. Sales Reps can delete their own notes only.
Each note has a small pin image on the left side of the display area. Selecting this will toggle the note as either pinned (in blue) or unpinned (in gray outline). Pinned notes will display on the main customer detail page.
Near the upper left-hand corner of the notes display area, there is the "sort by" dropdown menu. Select the menu to alternate between sorting the notes new-old or old-new. Default sorting is new-old.
Main Page -- Clients
Updated 10 months ago