
Clients
All roles have access to Clients.
The Clients page is the main page to access and view information on customers and leads. The main display allows you to see the name of the customer/lead, basic contact information, which sales rep has been assigned, the last time this client was contacted, and recent purchasing data. You can scroll up and down to see more information and navigate through multiple pages of entries to find what you are looking for.
Sales Reps can manage, edit, and delete their own leads or customers as well as unassigned leads. The page also allows users to filter, sort, and search through client entries.
When you need to drill down into a specific record, access the customer detail page associated with each individual client directly from the main Clients page by selecting the client name.

Clients List
To get to the main Clients page, select Clients in the main navigation menu.
Once on the Clients page, the screen shows the first 50 client entries by default. A dropdown menu at the bottom of the screen allows the number to be set to 25, 50, or 100 entries per screen.
Each client entry lists:
- Client, Address
- Lead/Customer, Business Type
- Leads are entries that have not made purchases yet.
- Customers are entries that have already made purchases.
- Lead/Customer, Business Type
- Primary Company, Companies, Warehouses
- Sales Rep, Alternate Rep
- Phone, Fax
- Last Call Date, Last Invoice Date, Last Assigned (date)
- Last three months of purchases by item volume
- Column title is a list of abbreviations for the last three months (e.g., Jan Dec Nov)
- GP 90 Day (total $, percentage)
- Revenue 90 Day (total $, percentage)
- 1Y Sales (historical graph with monthly plot points)
- Last Note
Scroll down and select the arrow to the next page to review more clients.
The search box in the upper left-hand corner of the page can be used to search for:
- Customer name
- Customer ID number
- Customer address
The searched-for data will automatically display below, in place of the full client list.
Clients can be filtered and sorted by the following options:
- State (multi-select dropdown)
- Sort (dropdown):
- At Risk (High – Low)
- Client Name (A – Z)
- Client (Z – A)
- GP 90 Days (High to Low)
- GP 90 Days (Low to High)
- GP Trend 90 Days (High to Low)
- GP Trend 90 Days (Low to High)
- Last Assigned Date (New – Old)
- Last Assigned Date (Old – New)
- Last Call Date (New – Old)
- Last Call Date (Old – New)
- Last Invoice Date (New – Old)
- Last Invoice Date (Old – New)
- Quantity Sold (last month) (High – Low)
- Quantity Sold (last month) (Low – High)
- Quantity Sold (2 months ago) (High – Low)
- Quantity Sold (2 months ago) (Low – High)
- Quantity Sold (current month) (High – Low)
- Quantity Sold (current month) (Low – High)
- Relevance
- Revenue 90 Days (High to Low)
- Revenue 90 Days (Low to High)
- Revenue Trend 90 Days (High to Low)
- Revenue Trend 90 Days (Low to High)
- More Filters:
- Sales Rep (dropdown)
- Alternate Rep (dropdown)
- Lead / Customer (dropdown):
- Lead
- Customer
- Business Type (multi-select dropdown):
- Variable options depending on business decisions
- Sales Status (dropdown):
- Active
- Inactive
- Do Not Call (dropdown):
- Callable
- Do Not Call
- Companies (multi-select dropdown)
- Warehouses (multi-select dropdown)
- Reset
The filtered data will automatically display below, in place of the full client list.
Sorting does not alter the information returned by your filter or search. Sorting changes the display order only for clients searched or filtered. The sorted client entries will automatically display in the order selected.
Movers are designed to help you navigate the application more efficiently. Client page Movers display customers who need attention in several categories with color-coding and KPI indicators. Selecting a Mover will take you to that page with a single click.
Client Movers include the following:
- Scheduled Today
- Contact Due
- Suggested Sales
- At Risk
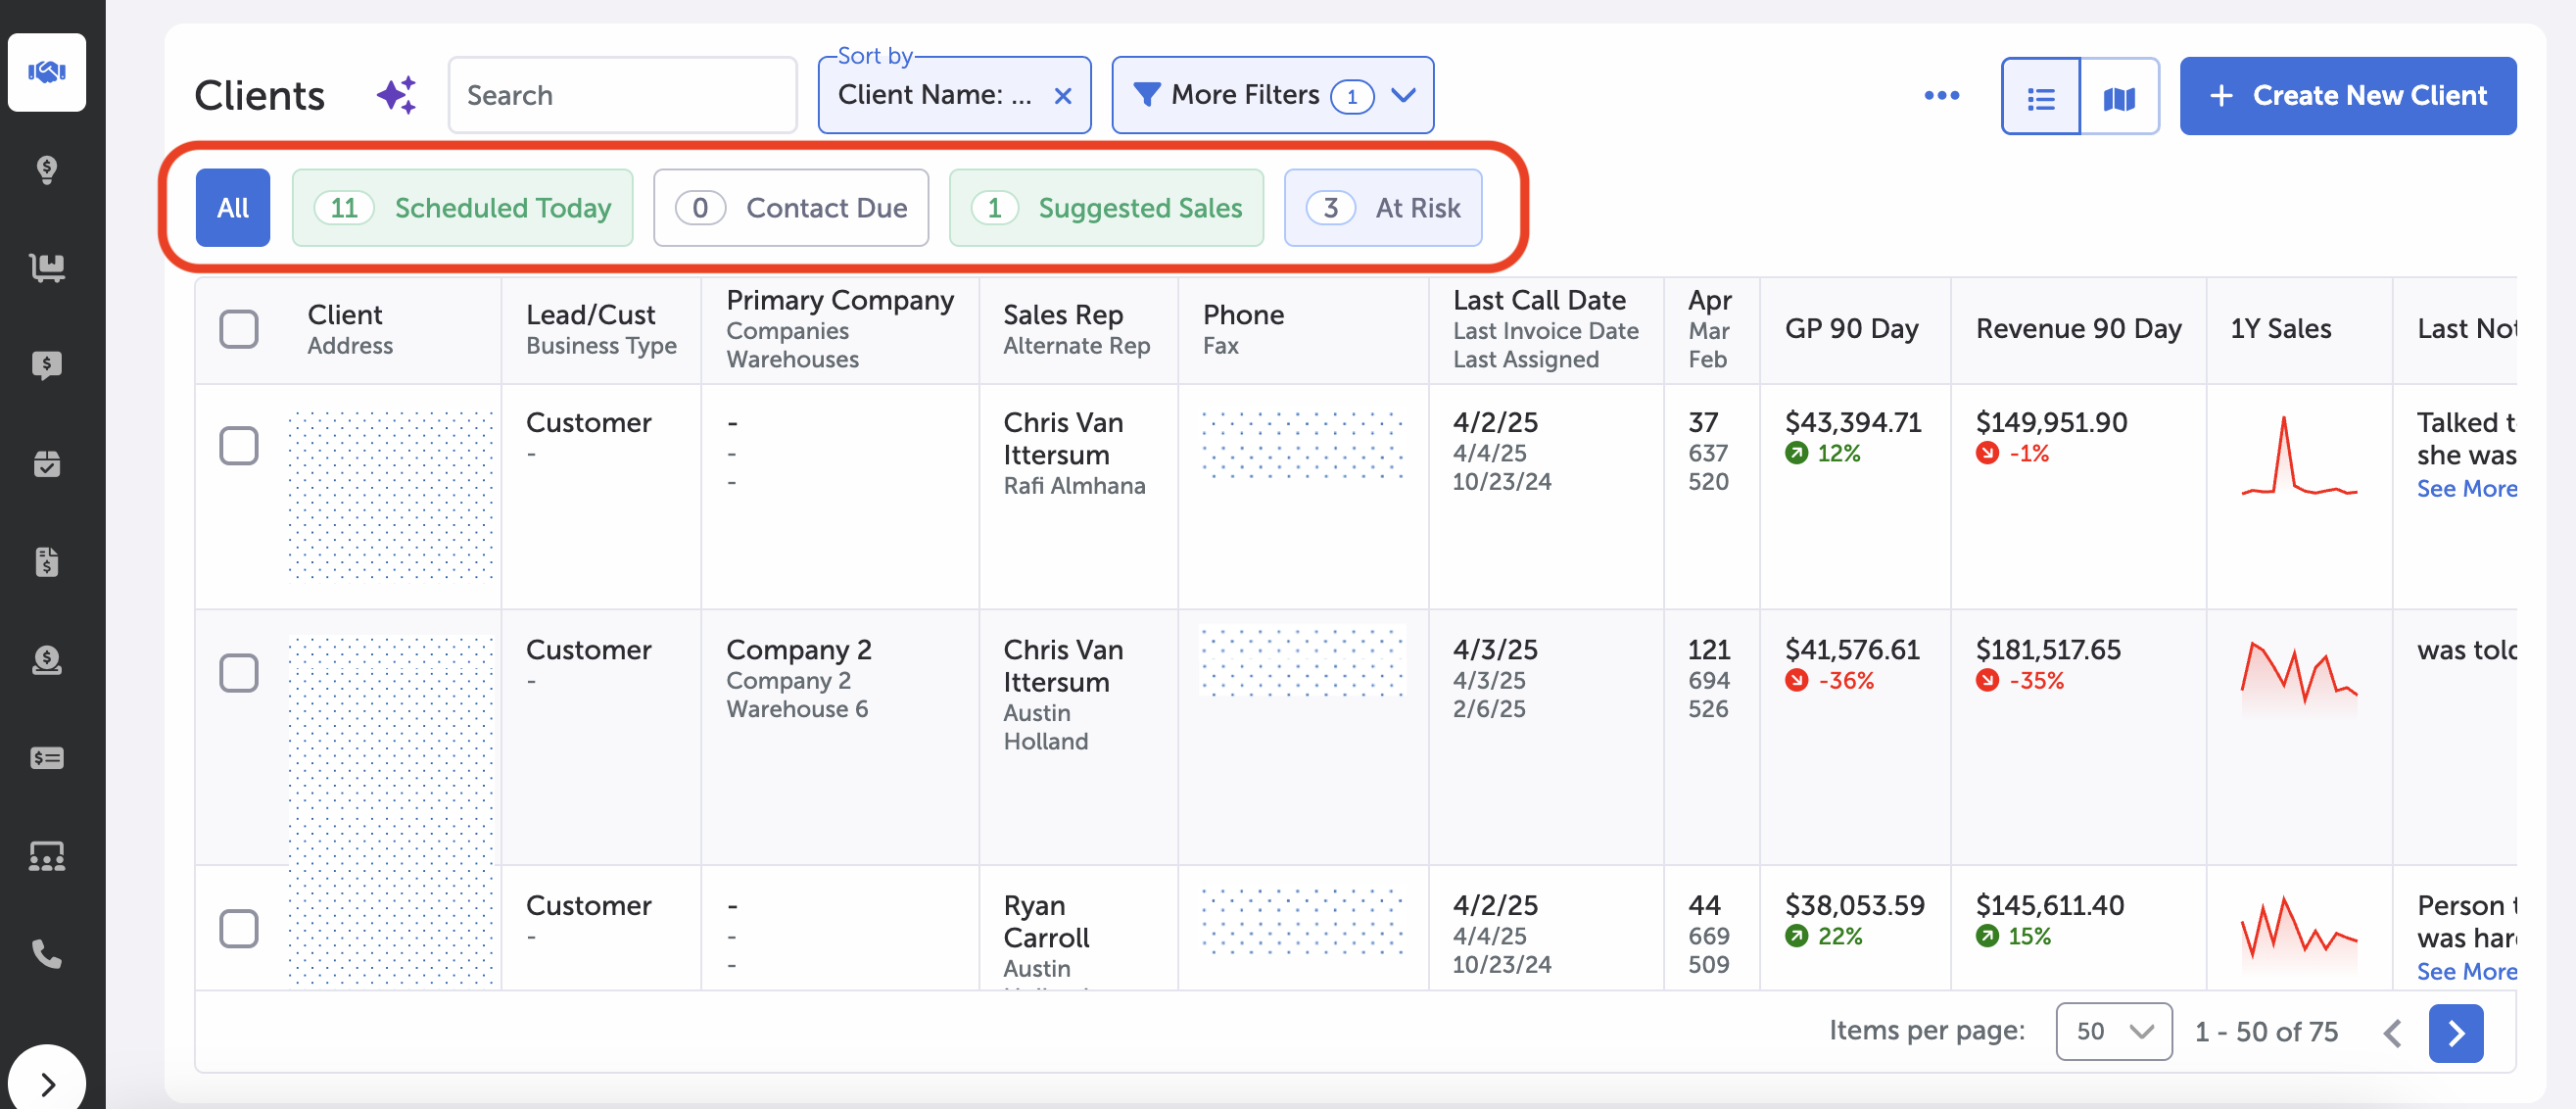
Client Movers
First, choose what client entries to update by selecting the checkbox to the left of their name. Or, you can choose all client entries at once by selecting the checkbox at the top (to the left of the column headers).
Next, select Edit selected clients in the row below the column headers.
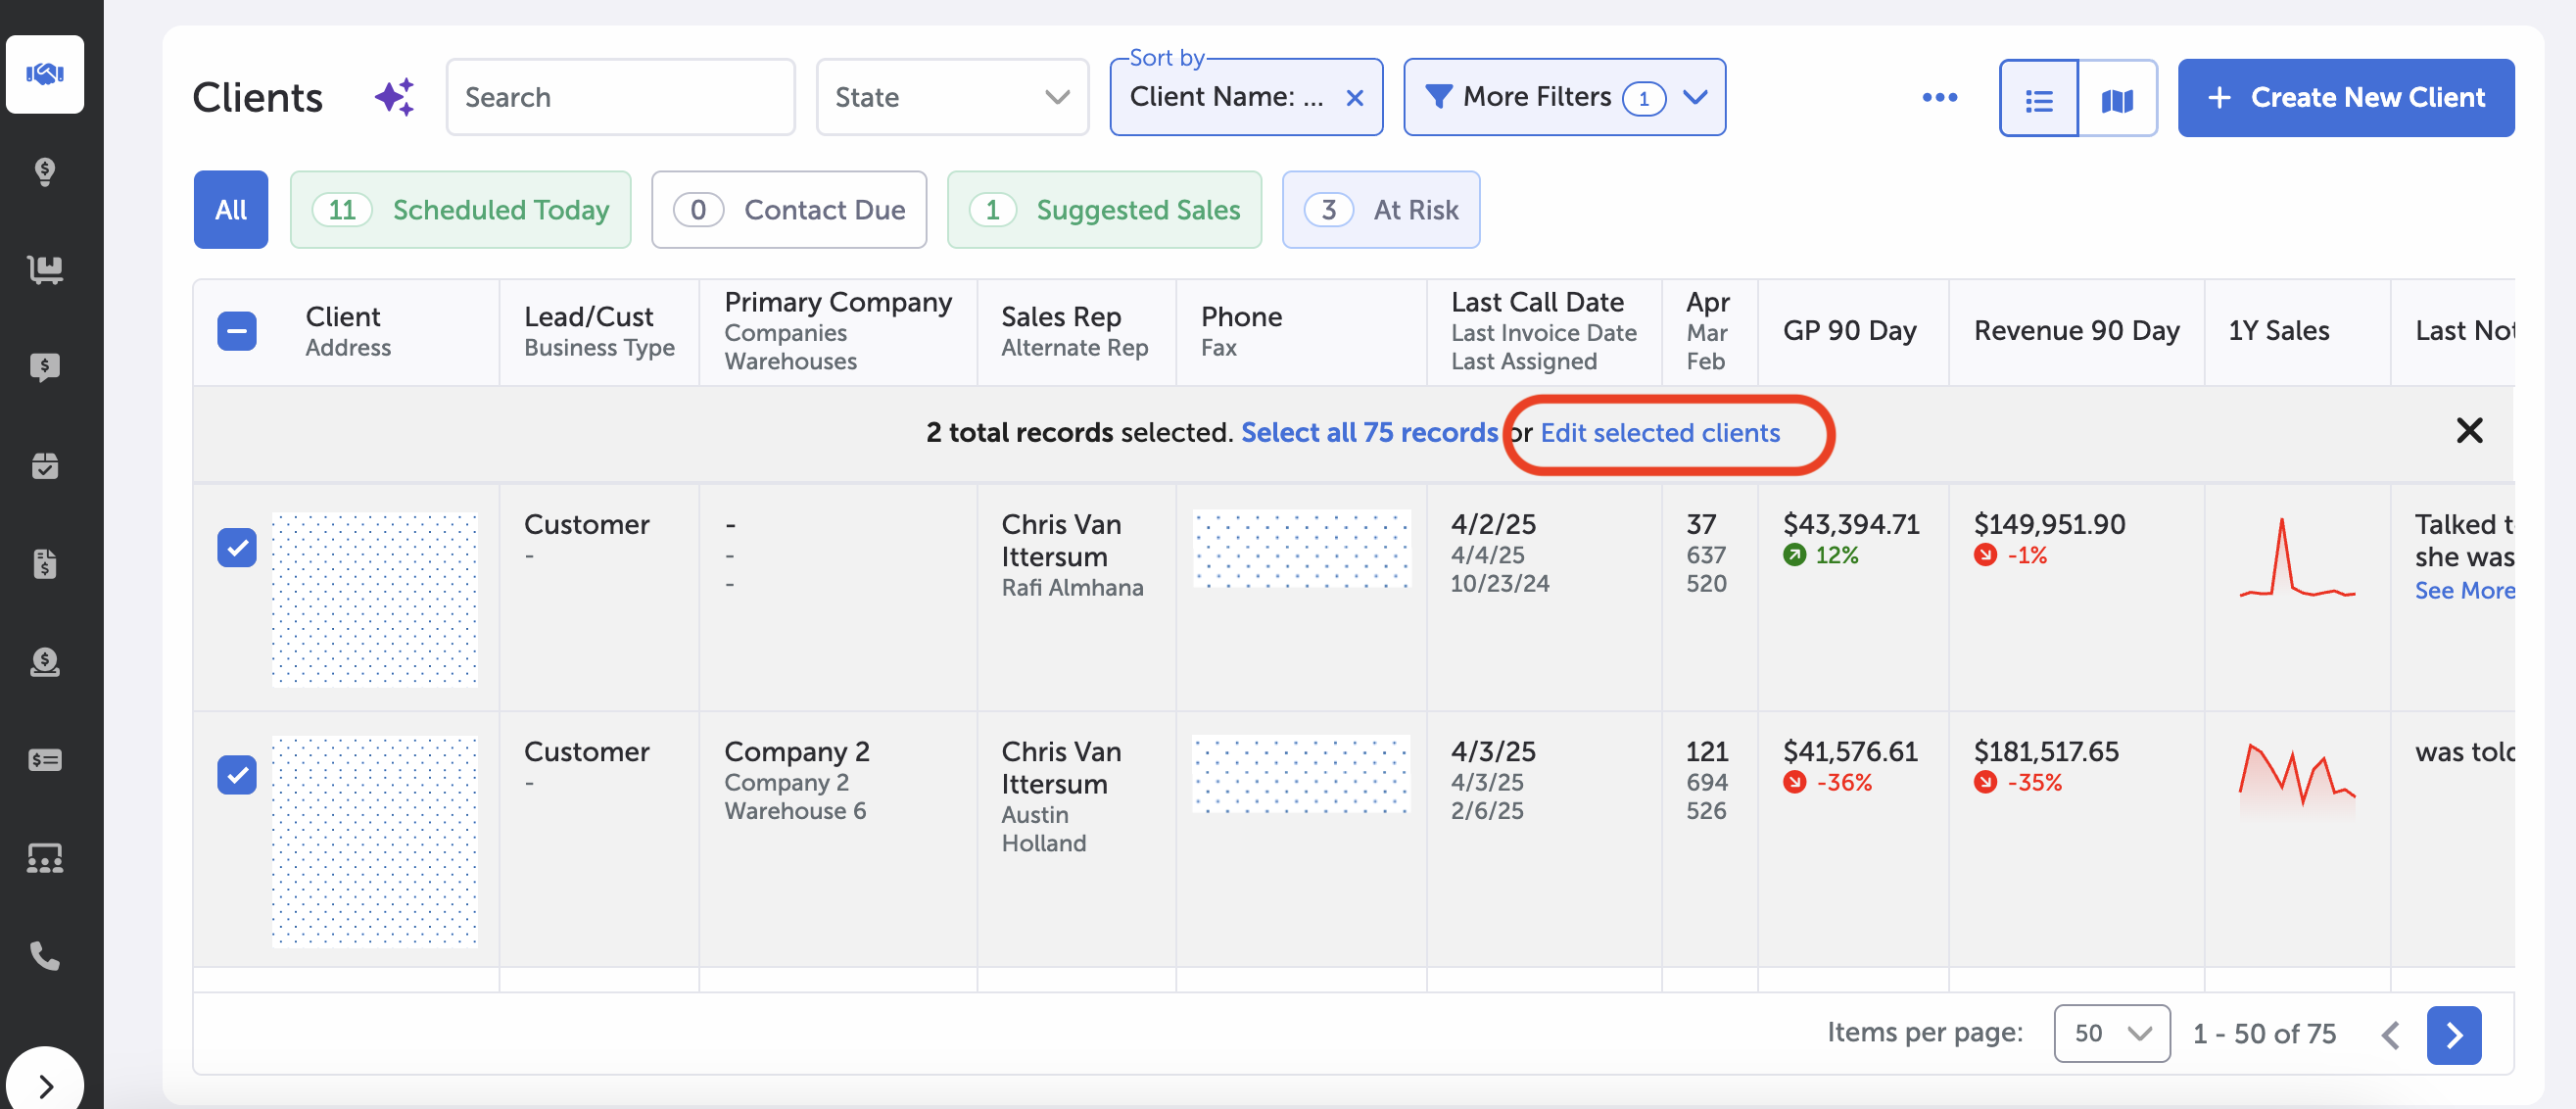
The max count for “Bulk Edit” is 500; otherwise an “Unable to get selected clients” error message is displayed.
Next, select an action. Options include:
- Unassign Clients
- Assign Clients to Sales Rep (select via dropdown menu)
- Distribute Clients to Sales Reps
- Unassign Alternate Rep
- Assign Alternate Rep (select via dropdown menu)
- Assign Clients to Group
- New dropdown appears so user can select group name
- Remove Clients from Group
- New dropdown appears so user can select group name
Select Cancel or Confirm.
Note: If the customer record originated within the CRM system, then a Sales Rep can be assigned or unassigned from the client. But if the customer record originated elsewhere--for example, from an integrated ERP system--then the Sales Rep will need to be reassigned there. Leads can be assigned or unassigned at any time.
Note on Assigned/Distributed Clients: For assigned leads, you can only select one Sales Rep, and assigning a new lead will not obey the max limit for leads set for that Sales Rep. For distributed leads, you can select multiple reps, and the leads can only be distributed there if the rep’s max limit has not already been reached.
Select the Create New Client button near the upper right-hand corner of the Clients display area.
From here, an input prompt will appear, where information on the new client can be entered.
Information fields include (fields marked with an * are required):
- Client name*
- Lead or Customer designation* (dropdown)
- Sales Status* (dropdown)
- Choose Active or Inactive
- Business Type*
- Specialties
- Sales Rep (dropdown)
- Alternate Rep (dropdown)
- Address 1*
- Address 2
- City*
- State*
- Zip*
- Business Phone*
- Business Fax
- Business Email
- Last Contact Date
- Primary Company* (dropdown)
- Companies
- Warehouses
- Primary Wholesalers (multi-select dropdown)
- Secondary Wholesalers (multi-select dropdown)
Select "Submit" at the bottom of the form to add your entry.
Depending on client’s particular business and decisions, additional fields may be present.
Select any client's name to access that individual client's account details page.
Updated 9 months ago